
Prerequisites
The Slider's Timeline is used for both autoplay functionality and Layer animation timing.
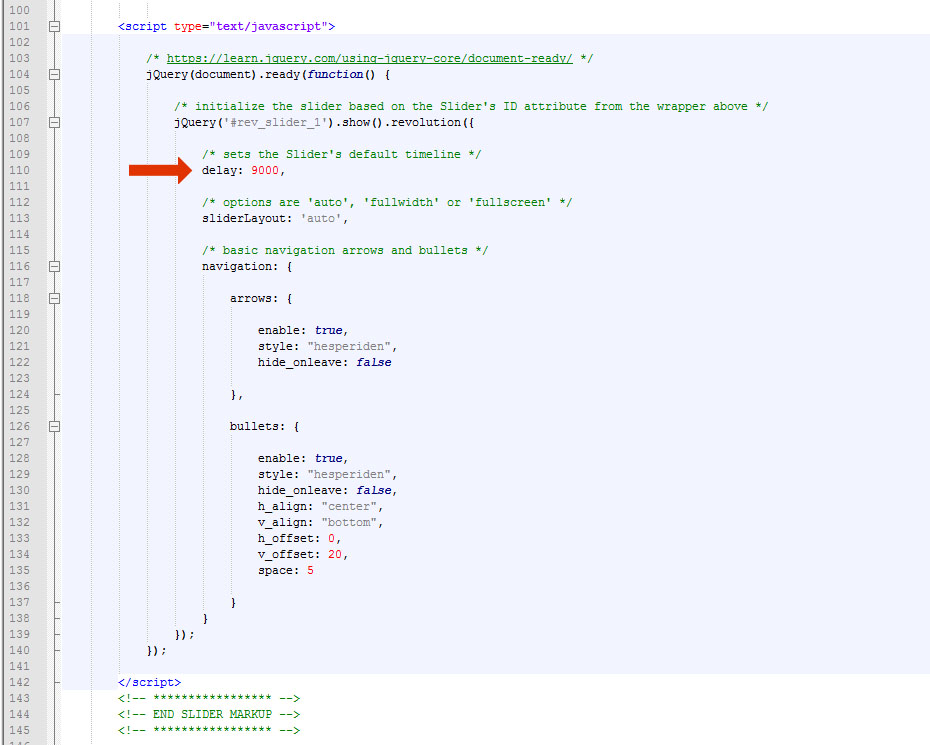
1. Add a "delay" (in milliseconds) to your Slider's JavaScript settings
/* initialize the slider based on the Slider's ID attribute from the wrapper above */
jQuery('#rev_slider_1').show().revolution({
/* sets the Slider's default timeline */
delay: 9000,
/* options are 'auto', 'fullwidth' or 'fullscreen' */
sliderLayout: 'auto',
/* basic navigation arrows and bullets */
navigation: {
arrows: {
enable: true,
style: "hesperiden",
hide_onleave: false
},
bullets: {
enable: true,
style: "hesperiden",
hide_onleave: false,
h_align: "center",
v_align: "bottom",
h_offset: 0,
v_offset: 20,
space: 5
}
}
});
2. Choose if the Slider should autoplay or not.
Slides will change automatically:
jQuery('#rev_slider_1').show().revolution({
/* sets the Slider's default timeline */
delay: 9000,
Slides will only change from user-interaction:
jQuery('#rev_slider_1').show().revolution({
/* sets the Slider's default timeline */
delay: 9000,
/* options that disable autoplay */
stopLoop: "on",
stopAfterLoops: 0,
stopAtSlide: 1,
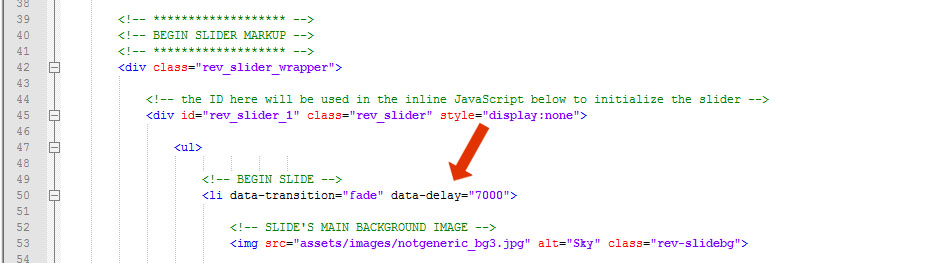
3. Override the Slider's default delay for any give Slide by adding an optional "data-delay" attribute to the Slide's list item.
<!-- BEGIN SLIDE -->
<li data-transition="fade" data-delay="7000">
<!-- SLIDE'S MAIN BACKGROUND IMAGE -->
<img src="assets/images/notgeneric_bg3.jpg" alt="Sky" class="rev-slidebg">
4. Add an optional progress bar if your slides are setup to change automatically.
Add the progress bar div immediately after the closing </ul> tag for the slides list.
</li><!-- END LAST SLIDE -->
</ul><!-- END SLIDES LIST -->
<!-- Example Progress Bar, with a height and background color added to its style attribute -->
<div class="tp-bannertimer" style="height: 5px; background-color: rgba(0, 0, 0, 0.25);"></div>
</div><!-- END SLIDER'S MAIN DIV -->
</div><!-- END SLIDER WRAPPER -->
Add the "tp-bottom" class shown in the example below to place the progress bar at the bottom of the slider:
<div class="tp-bannertimer tp-bottom" style="height: 5px; background-color: rgba(0, 0, 0, 0.25);"></div>
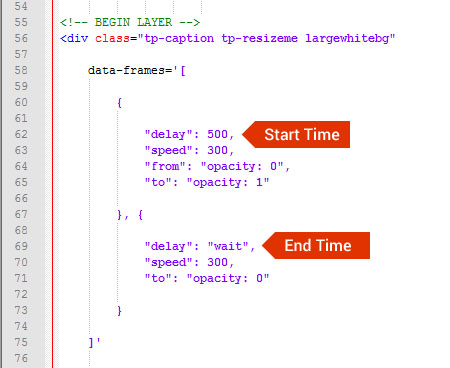
5. Choose at which point in the Slide's Timeline your content Layer's should animate in/out.
In the following example, the Layer will animate in and out based on the “delay” settings inside the “data-frames” attribute.
The first “delay” in the example below is for the start animation. And the second “delay” is for the end animation.
An ending delay set to “wait” ensures that the Layer will remain visible until the Slide officially changes. But you can also enter a number in milliseconds if you’d like the Layer to animate out beforehand.
Layer will remain visible throughout the life-cycle of the current Slide:
<!-- BEGIN LAYER -->
<div class="tp-caption tp-resizeme largewhitebg"
data-frames='[{
"delay": 500,
"speed": 300,
"from": "opacity: 0",
"to": "opacity: 1"
}, {
"delay": "wait",
"speed": 300,
"to": "opacity: 0"
}]'
Layer will animate out at the 5 second mark, before the current Slide's life-cycle ends.
<!-- BEGIN LAYER -->
<div class="tp-caption tp-resizeme largewhitebg"
data-frames='[{
"delay": 500,
"speed": 300,
"from": "opacity: 0",
"to": "opacity: 1"
}, {
"delay": "5000",
"speed": 300,
"to": "opacity: 0"
}]'
