
QUICK TIP:
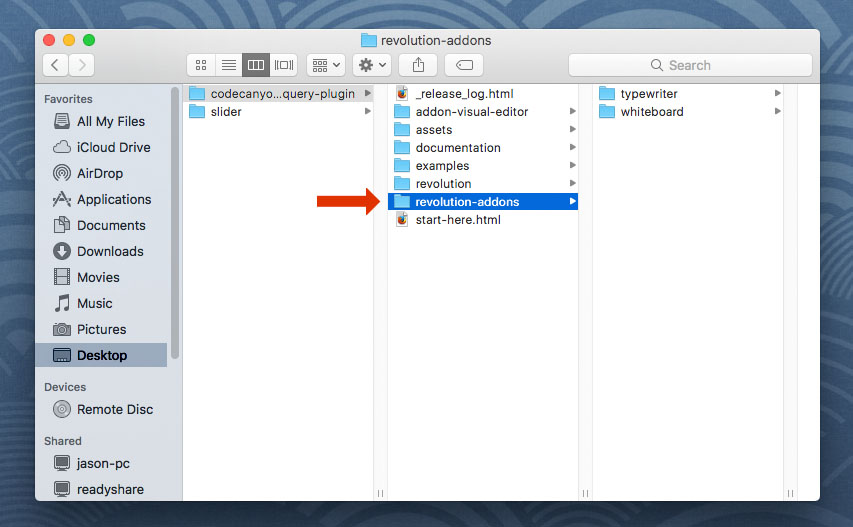
To get started with the Panorama Add-On, first add the "revolutions-addons" folder into your production site:
Next, add the Panorama stylesheet and script. The script should placed below all other scripts on the page.
<!-- PANORAMA STYLESHEET -->
<link type="text/css" href="revolution-addons/panorama/css/revolution.addon.panorama.css" />
<!-- PANORAMA SCRIPTS -->
<script type="text/javascript" src="revolution-addons/panorama/js/three.min.js"></script>
<script type="text/javascript" src="revolution-addons/panorama/js/revolution.addon.panorama.min.js"></script>
Next, assign a variable to your slider's main settings script as shown in the following example.
var slider = jQuery('#rev_slider_1').show().revolution({
/* ******************** */
/* SLIDER SETTINGS HERE */
/* ******************** */
});
Then initialize the Panorama Addon directly after the slider settings (shown above)
RsAddonPanorama(jQuery, slider);
Next, setup your Slides with your Panorama settings and images:
- "true"
- "false"
- "forward"
- "backward"
- "throw"
- "drag"
- "mouse"
- "click"
- "none"
- "true"
- "false"
- "true"
- "false"
<!-- BEGIN PANORAMA SLIDE -->
<li data-transition="fade"
<!-- panorama settings and image urls -->
data-panorama='{
"image":"images/panorama.jpg",
"autoplay":"true",
"autoplayDirection":"forward",
"autoplaySpeed":"20",
"controls":"throw",
"throwSpeed":"750",
"mousewheelZoom":"false",
"smoothZoom":"true",
"zoomMin":"75",
"zoomMax":"150"
}'>
<!-- Load the transparent .png file for PANORAMA Slides -->
<img src="assets/images/transparent.png" class="rev-slidebg">
<!-- ***************** -->
<!-- SLIDE LAYERS HERE -->
<!-- ***************** -->
</li><!-- END PANORAMA SLIDE -->