
Table of Content
Module
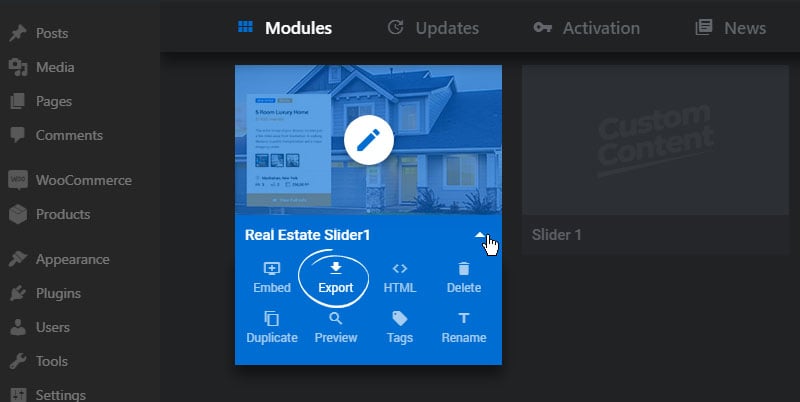
To export a module, visit the plugin’s main admin page and click the arrow icon for the Module you wish to export
Clicking “Export” will create a downloadable zip file that can then be Imported to another WordPress installation.
HTML
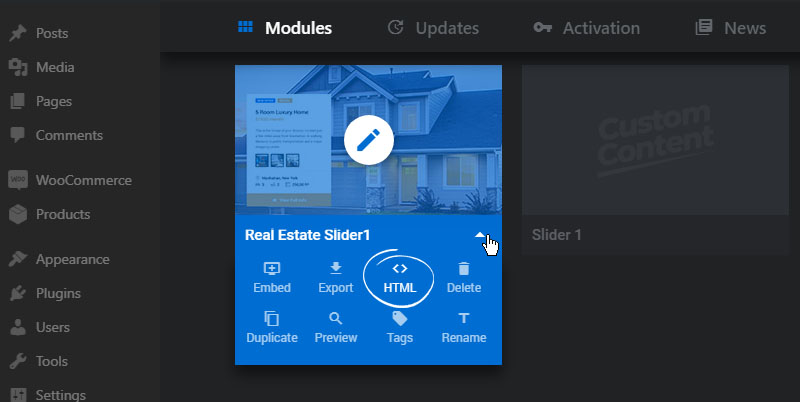
Clicking the “HTML” option will create a downloadable zip containing HTML, JavaScript, CSS and Image files that can then be added to your non-WordPress website.
Export Modules


